How to Properly Clean Your Keyboard
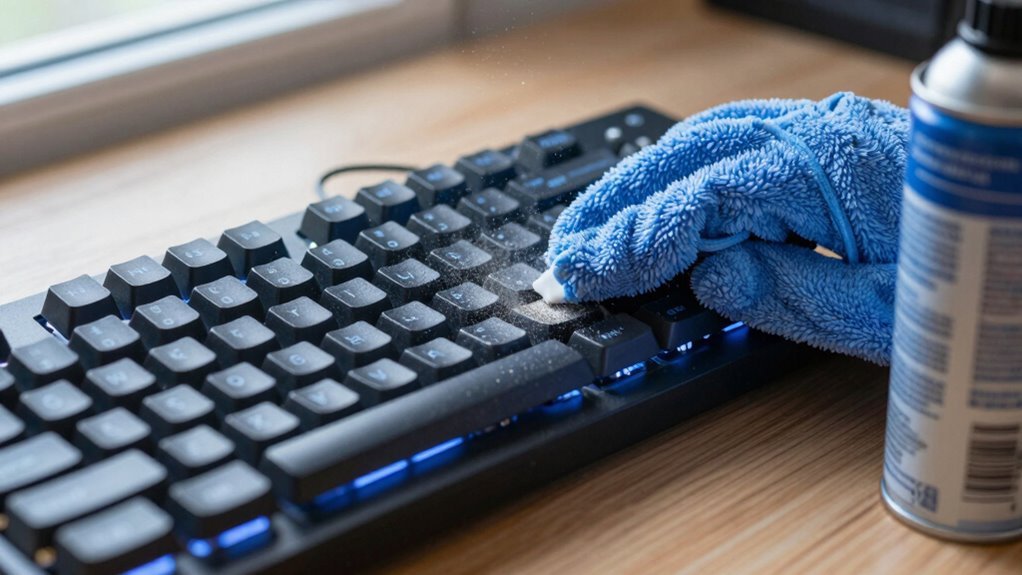
Unplug your keyboard and snap a photo of the layout—trust me, future you will thank you. Pop off keycaps with a puller (or careful prying), then blast crumbs from under the keys with compressed air. Wipe surfaces with a slightly damp microfiber cloth and 70% isopropyl alcohol, and let stubborn grime soak in soapy water. Scrub gently, rinse, and air dry completely before reassembling—clean keys click happier! Oh, and there’s a pro trick or two you’ll definitely want to try.
Unplug and Prepare Your Keyboard

Let’s get your keyboard ready for its spa day—because even tech needs a little TLC now and then!
First, power down—turn it off and unplug wired models, or take out the wireless dongle.
If it runs on batteries, swap those out too; we don’t want any surprise sparks or leaks.
Touch a metal part of your PC case to zap away static—think of it as a quick handshake with grounding.
No flammable cleaners near live circuits, okay?
Isopropyl alcohol is great, but only after everything’s disconnected.
Set up shop on a clean, flat surface with good light.
Lay down a soft cloth to catch crumbs and protect your keys.
Keep compressed air, microfiber cloths, and little trays nearby—they’re your cleaning sidekicks.
Stay safe, stay dry, and get ready to make your keyboard feel brand new again.
You’ve totally got this!
Remove Keycaps Safely
Now that your keyboard’s powered down and you’ve gathered your cleaning crew—compressed air, microfiber cloths, and that trusty soft cloth to catch wayward crumbs—it’s time to get up close and personal with those keys.
Grab a keycap puller if you’ve got a mechanical board—it’s like a tiny lifter that grips and lifts without scratching. No puller? No problem! Try a plastic spudger or even a bent paperclip for a DIY fix.
For laptop keys, gently pry at the hinge points—think of it as keycap surgery, not tug-of-war.
Watch out for big keys like spacebar; they’ve got stabilizers that need even pressure. Pull straight up, never twist, unless you’re into accidental disassembly.
Peek underneath first—some keys don’t wanna come off, and that’s okay.
Snap a pic before removal, unless you enjoy mystery reassembly puzzles.
Keep things organized, go slow, and your keyboard will thank you later—with clean, clicky glory.
Using compressed air helps remove dust and debris from under the keys effectively.
Gather Essential Cleaning Tools

Getting your cleaning kit ready is like assembling a tiny superhero squad for your keyboard—each tool has a special power, and together, they’ll vanquish grime, dust bunnies, and mystery gunk hiding beneath your keys.
Grab compressed air to blast away dust from between keys and switches—just start from the top left and keep it light.
You’ll need isopropyl alcohol (70% or higher) to disinfect surfaces, using it on a microfiber cloth or cotton swab to wipe away fingerprints and gunk.
The microfiber cloth is your MVP—lint-free, gentle, and streak-free.
Cotton swabs and soft brushes reach into tight spots, while a keycap puller safely removes keys.
Don’t forget a bowl for soaking, soapy water, and a towel for drying.
Store keycaps in a Ziploc to avoid a scavenger hunt later.
Trust me, your keyboard will thank you—maybe even start typing faster! Regular cleaning helps extend your keyboard’s longevity.
Clean Surface Keys and High-Use Areas
Ever wonder why your spacebar looks like it’s hosting a dirt festival? That grimy buildup comes from oils, crumbs, and germs you tap into keys every day—especially if you snack while typing.
Clean surface keys weekly (or more if shared or heavily used) to keep things hygienic and looking fresh.
First, power off your keyboard—no one wants a short-circuit surprise.
Grab a microfiber cloth barely dampened with 70% isopropyl alcohol or mild soapy water, and gently wipe keys in smooth strokes.
Use a cotton swab for tight spots between keys, and don’t forget the spacebar and Enter key—germ magnets!
Compressed air blows out hidden junk, and a soft brush loosens stubborn gunk.
Stay away from bleach or harsh scrubbing, and never drench your keys—soggy keyboards don’t party well with electronics.
Soak and Scrub Removable Keycaps

Diving into a deep clean? Great! Start by unplugging your keyboard and snapping a pic of the layout—trust me, future-you will thank present-you. Pop off removable keycaps with a puller, then toss them into warm, soapy water or a fizzing denture bath for 30–60 minutes.
| Method | Tip |
|---|---|
| Soapy soak | Use warm water + dish soap |
| Denture power | One tablet = magic sparkle clean |
| Scrub time | Toothbrush those tiny grooves |
| Drying crew | Air dry overnight—no sogginess, promise! |
After soaking, gently scrub grimy spots with a toothbrush, even using toothpaste for tough stains. Rinse well, pat dry, then let them chill on a towel—completely dry before reassembly. Pop them back using your layout photo, and boom: keyboard fresh as a daisy!
Clean Between Keys and Switches
How do you get rid of all that gunk hiding between your keys without wrecking the works? Start by unplugging your keyboard—safety first!
Tilt it sideways and blast away dust and crumbs with compressed air, so you don’t push debris deeper.
Grab a soft paintbrush or makeup brush and gently sweep around the switches; it’s like a tiny spa treatment for your keyboard.
Spot something stubborn? Use tweezers to pluck out hairs or fuzz with precision.
For sticky spots, dip a cotton swab in isopropyl alcohol and carefully clean around, not on, the switches.
Don’t drown it—just a quick swipe!
Use a microfiber cloth to catch leftover dust, and let everything air dry completely.
And hey, if your keyboard could talk, it’d probably say “Ahhh, much better!”
Give it some love, and it’ll keep ticking.
Perform a Deep Clean Regularly

Giving your keyboard a thorough deep clean every few weeks keeps it running smoothly and makes typing way more enjoyable. Don’t wait for keys to stick or look grimy—stay ahead of the gunk! Here’s how often you should get started:
| Usage Level | Clean Every |
|---|---|
| Heavy (daily/gaming) | 4 weeks |
| Moderate (office/home) | 6–12 weeks |
| Light (rare use) | 3–6 months |
| Spills or gunk | Right away! |
| Keys acting up | Don’t delay—clean now |
Tackle spills fast, and never ignore sticky keys—they’re screaming for help! If you’re a prolific typer or share your board with others, monthly cleanings are your best friend. For casual use, a quarterly spa day works great. Either way, unplug first, grab your tools, and show your keyboard some love—your fingers will thank you later.
Dry and Reassemble Properly
Wipe down that last greasy keycap and get ready to bring your keyboard back to life—dry time is where the magic happens!
Lay each keycap face up on a towel to drain, then flip them upside down overnight—no soggy surprises.
Make sure the underside’s bone-dry so your switches stay in touch (literally).
Snap pics before disassembly? Smart move—now use that layout photo like your reassembly GPS.
Pop stabilizers in first—hook one side, then the other—like snapping in a seatbelt.
Press keycaps straight down with a cheerful *click*—no wiggling, no drama.
Blow out any hidden dust in the body with compressed air, wipe gently, and let it chill in a sunny spot or near a heater.
Double-check every part’s dry—because “a little damp” means “broken keys later.”
Seal the case tight, seat ribbons right, test every key, and boom—your keyboard’s reborn!
Frequently Asked Questions
How Often Should I Clean My Keyboard?
You should clean your keyboard weekly to keep it fresh and germ-free.
If you snack while typing or share it with others, swipe it down more often—maybe even daily.
Every month, give it a deeper clean, especially if you’re a heavy typer.
And every three months, go under the keys where crumbs throw tiny underground parties.
Trust me, your fingers (and your computer) will thank you!
Can I Use Water to Clean Non-Removable Keys?
Nope, you can’t use water on non-removable keys—call it a medieval torture method for your tech!
Water sneaks deep inside, rusting circuits like time-traveling saboteurs.
Instead, grab a barely damp microfiber cloth, squeeze out excess, and gently wipe.
Follow up with a dry swipe.
For crumbs and gunk, blow them out like you’re wishing on a dandelion.
Keep it light, keep it safe, and your keyboard’ll thank you—no exorcism needed.
Is It Safe to Use Alcohol on Rubber Keypads?
Yes, you can use alcohol on rubber keypads, but only if it’s 99%+ isopropyl—skip the 70% stuff, it’s sneaky and leaves gunk.
You’ll avoid stickiness and weird deformations, which your keys will totally thank you for.
Dampen a cloth, gently wipe, and don’t drown the keys—keep it light!
Your keypad stays happy, clean, and bouncy, like it never missed a beat.
Win-win!
What Should I Do if My Keyboard Gets Wet?
One in three people spill on their keyboard—don’t panic, you’ve got this!
Unplug it fast, flip it upside down, and let gravity do the work.
Gently shake out liquid, dab with a soft cloth, then air-dry for 24–48 hours.
No rice, no hairdryers, promise.
Position near a fan, stay patient, and resist testing keys.
You’ll save your keyboard *and* avoid a sticky surprise later—teamwork between you, gravity, and time wins every time!
Can Cleaning Improve Keyboard Responsiveness?
Yes, cleaning can boost your keyboard’s responsiveness—grime and gunk love to sneak under keys and cause sticky or unresponsive buttons.
When you wipe it down regularly, you’re not just killing germs, you’re freeing trapped keys and keeping things running smoothly.
Think of it like a spa day for your keyboard—fresh, clean, and ready to type at lightning speed!
Conclusion
You’ve got this! Picture Sarah, whose coffee-spilled keyboard once sounded like a popcorn machine—after cleaning it, hers keys clicked like new. With a little care, yours will feel fresh and work better too. Just unplug, clean, dry, and reassemble. A few minutes now saves headaches later. Go on, give those keys the spa day they deserve—you’ll both feel better!