DIY Standing Desk Guide: Build Your Own Workspace
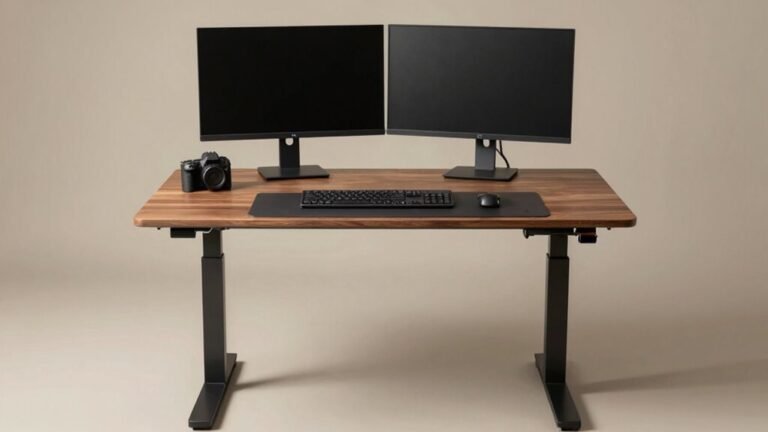
You’re building a standing desk that’s tough, stylish, and totally yours—start with a sturdy steel or sleek aluminum frame that handles daily up-down duty without wobbling. Pick a desktop from smooth bamboo to budget-friendly laminate, then size it right with basic tools like a tape measure and circular saw. Assemble the frame snug but not tight, test the motors, and secure the top with care. Run cables clean with trays and labels, add a surge protector, and bam—your workspace slays. Wait till you see how easy it is to tweak it *just* right.
Choose the Right Frame for Your Needs
Wondering what keeps your desk steady through all those up-and-down adjustments? It’s the frame—the unsung hero of your DIY standing desk.
If you’re all about durability, steel’s got your back, offering rock-solid strength and lasting performance, even with daily tweaks.
Need something tougher? Carbon steel handles heavy gear and constant motion like a champ, though it’s a bit pricier and heavier.
Prefer lighter and sleek? Aluminum strikes a sweet balance—strong, stylish, and easy to move.
For custom fits, adjustable-width frames flex to your space, perfect for tight corners or giant worktops.
On a budget? Fiber-reinforced plastic keeps costs low and weight light—great for light-duty use.
Whichever you pick, you’re not just building a desk—you’re crafting a workspace that moves with you, one smooth lift at a time. No wobbles, no drama—just steady, customizable action.
Aluminum frames offer excellent corrosion resistance, making them ideal for humid environments or long-term use without rust concerns.
Selecting Premium vs. Budget Desktop Materials
What if your desk could look like a million bucks without you actually spending it?
You’ve got options—big time.
Go premium with solid hardwood or bamboo for a sleek, durable surface that ages gracefully.
Or keep it budget-friendly with laminate-over-MDF for a clean look that won’t break the bank.
Either way, you’re in control.
- Solid hardwood – rich grain, sanded for decades, but heavy and pricier.
- Bamboo – eco-chic superstar, fast-growing, but watch for dents.
- Plywood with veneer – real wood vibes, stable, and wallet-smart.
- Laminated MDF – smooth, affordable, great for beginners, just keep it dry.
Pick your fighter based on style, strength, and savings—your dream desk is closer than you think!
Laminated surfaces offer enhanced durability thanks to their multi-layer construction, making them highly resistant to everyday wear, and this laminated finish can closely mimic the look of natural wood while maintaining a consistent, clean appearance.
Essential Tools for a Smooth Build Process

Getting your hands dirty? Awesome—you’re ready.
First, grab a tape measure (25–35 ft is perfect) and a square to keep corners sharp and cuts accurate.
Use a chalk line or laser level to map long, straight edges and keep everything balanced.
A center punch stops drill bits from skating across finished wood—nobody likes surprises.
For cutting, a circular saw with a straight guide works great, though a table saw’s ideal if you’ve got one.
Jigsaws shape curves, routers clean edges, and sanders smooth everything out.
You’ll need a solid drill/driver (18V+) with bits, a torque-sensing impact driver for tight bolts, and a pocket-hole jig for hidden strength.
Don’t forget clamps, sawhorses, and lifting straps—your back will thank you.
Ensure your frame supports your weight capacity needs to prevent wobbling or structural failure.
Suit up with safety glasses, ear protection, and a mask.
Now, aren’t you glad you came prepared?
Step-by-Step Assembly of the Desk Frame
Let’s get that frame standing strong—first things first, lay out every piece like you’re prepping for a puzzle you’ll crush in record time.
Start by fastening the C-frame feet to the legs with four M6x14 screws each, keeping them loose at first—tighten later to avoid cross-threading.
Once both legs are set, slide the side brackets into the crossbars, aligning the longer ends to the front.
Secure them with M6x10 screws, hand-tight at first, then finish with that trusty 4mm Allen wrench.
Connect the legs with the center rails, groove-side in and thick ends down.
Then, lock the motorized mechanism into place, plug in the cables, and give it a quick test—nothing beats that little victory buzz.
- Screw feet to legs, front-facing and snug
- Attach side brackets to crossbars, front forward
- Connect center rails between legs, grooves inward
- Mount motor and test controls before moving on
Building and Finishing the Desktop Surface

While your frame waits patiently, it’s time to build a desktop surface that’s not just tough and smooth but also a joy to work on—kind of like giving your workspace a custom-tailored suit.
You’ve got options: MDF is smooth and warp-proof, perfect if you’re after a sleek, paint-ready finish.
Want something eco-chic? Try bamboo—it’s durable, looks like light hardwood, and handles dings better than you’d think.
Or go classic with solid wood for that rich, natural vibe, just know it’ll need a little extra love to stay looking sharp.
Laminate tops are tough cookies, resisting scratches and spills like a pro, while steel brings serious strength (and weight).
Pick a heavy, quality board—American-made beats flimsy imports every time.
Seal edges, sand smooth, and boom—you’ve got a surface that’s built to impress and last.
Your desk’s personality starts here, so have fun with it!
Integrating Electrical Components and Power Access
A well-wired standing desk doesn’t just power your devices—it keeps your setup clean, safe, and moving as smoothly as the desk itself.
You’ll avoid tangled cords, tripped breakers, and that annoying “zap” when your mouse dies mid-zoom call.
Here’s how to get it right:
- Use a desk-mounted surge protector—it moves with the desktop and keeps all your plugs in one tidy spot.
- Mount the control box underneath near the frame, so wires stay short, tidy, and easy to reach if you ever need to reset it (we’ve all been there).
- Run cables through a drag chain or wire basket to protect them from snags, bends, and the daily rise-and-fall grind.
- Label every connection—your future self will thank you when troubleshooting feels like a breeze, not a puzzle.
Power up smart, and your desk won’t just rise—it’ll shine.
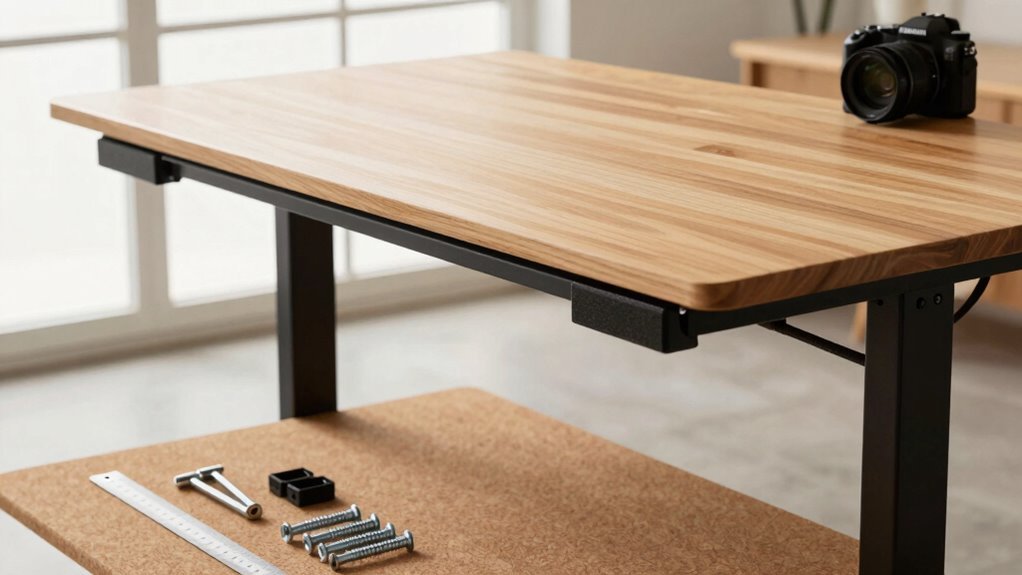
Securing the Top to the Frame Safely

How’s it feel to be this close to having your dream desk come together? Pretty awesome, right?
Now it’s time to secure that top to the frame—safely and snugly.
Flip your desktop upside down on a soft surface (your floor’s not a scratch museum, after all). Line up the frame just right, center it, and double-check with a level—because wobbly desks are *so* last decade.
Mark your screw points, pre-drill holes to keep wood from splitting, and use the hardware that came with your frame.
Got a glass top? Use those rubber spacers—nobody wants a cracked tabletop.
Start by tightening screws a little at a time, working in a crisscross pattern so everything stays even.
Don’t go full Hulk on the screws—just snug ’em up.
Flip it carefully, admire your handiwork, and give it a little shake test.
If it holds, you’re golden!
Optimizing Ergonomics for Comfort and Health
Since you’ve built your standing desk, you’re ready to dial in the sweet spot where comfort meets productivity—hello, happy body, hello focus!
Get these four tweaks just right and your back, wrists, and eyes will thank you all day long:
- Set your desk height so your elbows bend at 90°—forearms flat like you’re casually typing your next big idea.
- Line up your monitor’s top with your eyes and arm’s length away—no more neck-crane drama or squinting like you’re spotting a squirrel.
- Keep keyboard and mouse close and level—wrists straight, shoulders chill, like you’re typing in zero gravity.
- Switch between sitting and standing every 30–60 minutes—add a comfy mat and shift your weight like you’re casually dancing to your favorite playlist.
Your spine will stand tall, and so will your energy!
Managing Cables and Adding Functional Accessories

Now that your posture is on point and your desk feels like an extension of your focus, let’s tackle the jungle of cords sneaking across the floor—because tripping over a charger mid-workflow is *not* the adrenaline rush you need.
Snap on an under-desk tray to stash power strips and bundle cables neatly—no more spaghetti under your feet.
Use adhesive raceways to guide cords along desk legs or walls, and flex cable spines down to your PC with just enough slack to move freely.
Magnetic vertical channels keep wires tidy when you switch heights, while Velcro ties and clips organize without crushing cables.
Add grommets for clean cable entry and clamped racks for storage without drilling.
Go wireless where you can, and anchor everything with zip ties or Skalon mounts.
For under $100, your desk goes from messy to majestic—no electrician required, just smarter, safer vibes.
Maintenance Tips to Extend Your Desk’s Lifespan
Ever wonder why your standing desk feels a little sluggish or creaky after a few months?
It’s probably craving a bit of TLC—not a spa day, but close!
A well-maintained desk can last over a decade and keep your workspace smooth and stable.
You’ve put love into building it; now let’s keep it running strong.
Here’s how:
- Wipe it down weekly with a damp microfiber cloth—dust is sneaky and loves to gum up motors and legs.
- Tighten screws and bolts every few weeks; a wobbly desk isn’t just annoying, it’s a cry for help.
- Don’t overload it! Stick to the weight limit unless you want your desk throwing in the towel mid-adjustment.
- Keep it in a cozy spot—away from damp basements or sun-baked windows that could warp, rust, or fry its insides.
Your desk’s got your back—return the favor!
Frequently Asked Questions
Can I Convert My Existing Desk Into a Standing Desk?
Yes, you can turn your current desk into a standing desk—no magic wand needed!
Just swap the legs with an electric or manual frame, and boom, height adjustment with the push of a button.
Or, slap on a converter top if you hate tinkering.
Add a monitor arm, maybe a riser made from books (hey, no judgment), and voilà—ergonomic, wobble-free standing setup ready to rock!
How Do I Repair Scratches on My Wooden Desktop?
Who knew your kitchen could double as a wood doctor?
Fix scratches in a flash—grab a walnut and rub it right in, like magic makeup for wood.
The oil hides scratches and plumps the grain fast.
Got bigger boo-boos?
Try a dab of oil-vinegar mix, 1:1, let it soak, then wipe.
It’ll smell like salad, sure, but hey—no judgment.
Finish with a wood marker to touch up any leftover marks and buff to a happy shine.
Is It Safe to Use a Standing Desk During Pregnancy?
Yes, you can safely use a standing desk while pregnant—if you play it smart.
Don’t just stand there like a statue; switch things up every 30 to 60 minutes.
Use a footrest, wear comfy shoes, and keep one foot elevated to ease pressure.
Listen to your body, take breaks, and chat with your doctor.
With the right setup, you’ll feel energized, not drained—like a happy pickle in a jar of wellness!
Can I Add a Standing Desk Converter to a Regular Desk?
You absolutely can give your regular desk a standing superpower with a converter—think of it as a fitness upgrade for your workspace!
Just make sure your desk’s deep enough (around 24 inches), sturdy, and has the right edge access.
Clamp or electric, it’ll lift your screen high, save space, and keep you moving.
Boom—standing breaks, no desk swap needed!
What’s the Quietest Motorized Frame Available for DIY Builds?
You’ll want a premium frame like the iMovR Vigor—it’s whisper-quiet at around 42 dB, so it won’t scare your coffee mug into spilling.
Pick one with brushless motors and ball screws, they’re smooth and sneaky-quiet.
Add rubber mounts and tighten everything snug, or you’ll hear more creaks than a haunted house.
Go slow on speed too—less noise, more chill.
Your ears (and cat) will thank you.
Conclusion
You did it—your custom standing desk stands proud, built with your own two hands! Did you know, over 50% of remote workers say they move more when using a standing desk? That’s you now, boss. It’s sturdy, stylish, and totally yours. Grab your coffee, wiggle those toes, and enjoy your new workspace win—no assembly lines, just pure DIY pride. Boom!