How to Look Good on Webcam: Lighting and Angles
Position your main light in front, angled 30–45 degrees from your face, and keep it close to eye level for a natural glow. Use a softbox or daylight bulb to avoid harsh shadows, and add a subtle backlight to make your hair pop. Face a window for free, flattering light—just don’t turn your back to it. Two lamps can fake a pro setup fast. Play with angles, not flat overheads, and warm-but-neutral tones (around 4500K) keep skin looking fresh. Skip the silhouettes and shine like you meant to be seen—there’s more where that came from.
Position Your Light Source Strategically
When you’re trying to look your best on camera, where you place your light makes all the difference—think of it like setting the stage for your face to steal the show. Put your main light in front of you, angled 30–45 degrees toward your face, so every feature gets the spotlight.
Keep it no more than 45° from your camera to avoid flat, boring shots.
Place the light at eye level or just above—no overhead bulbs unless you want to look like a spooky campfire story.
Skip the backlight entirely, or it’ll turn your face into a shadowy mystery.
Use daylight bulbs for that fresh, natural glow—no one wants to look jaundiced on Zoom.
Angle softboxes or LED panels for subtle dimension, not drama.
And hey, your phone flashlight doesn’t count—give yourself the lighting love you deserve!
For even better results, consider using two-point lighting to enhance depth and eliminate flatness.
Use Multiple Lights for Dimension
You’ve probably noticed how flat you look with just one light—like a cardboard cutout of yourself—but here’s the secret: layering lights instantly brings your face to life.
Use a key light at a 45-degree angle, slightly above your eyes, to brighten your features.
On the opposite side, place a softer fill light to gently lift shadows without washing you out.
Then, sneak a back light behind you—high and behind your head—to add a subtle glow that separates you from the background.
Think of it as your personal spotlight moment, minus the drama (unless you want it).
Three lights create depth, dimension, and a polished look that makes you pop on camera.
Even with two lights, smart placement gives you that pro-level glow.
Say goodbye to blending into your wall like a forgotten poster.
With layered lighting, you’re not just seen—you’re unforgettable.
A large softbox can create a visible catch light in your eyes, enhancing engagement and making your gaze more dynamic on camera.
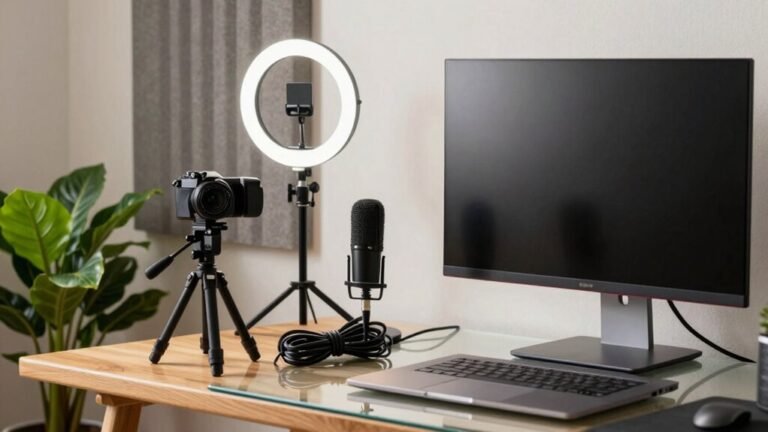
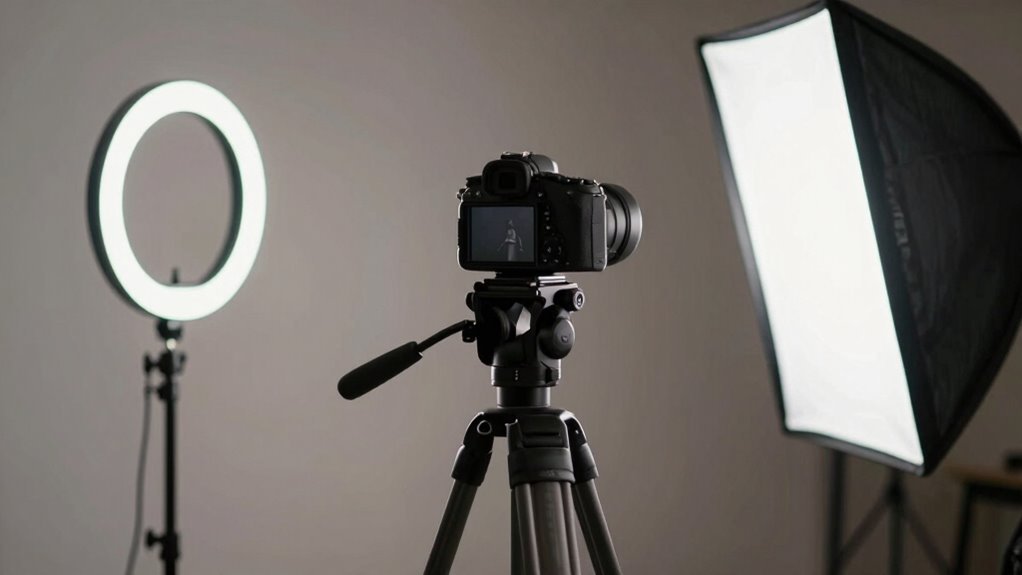
Choose the Right Light Type and Tools

If you’ve ever looked at your webcam feed and felt like you were starring in a budget horror movie, the fix might be simpler than you think—lighting is the unsung hero of looking human on camera. Grab an LED fixture with adjustable brightness to mimic daylight and flatter your skin tone—just add a diffuser for that soft, glowy look. Love selfies? A ring light like the F&V R-300 zaps away shadows and makes your face pop. For pro vibes, set up a softbox—like the Linco Flora—at a 45-degree angle to sculpt your features gently. No fancy gear? No problem. Two desk lamps with daylight bulbs at eye level work magic. Clamp lights with diffusers or tunable Philips Hue lamps are cheap hacks with big payoff. And hey, if the sun’s shining, park yourself by a window—but don’t rely on Mother Nature alone. Mix natural and artificial light for backup when clouds roll in. Consistent lighting improves presence and effectiveness during meetings, especially when you prioritize consistent illumination.
Set the Ideal Color Temperature
Ever wonder why your skin sometimes looks like you’re lit by a campfire—or a spaceship?
That’s color temperature in action, measured in Kelvin (K).
Lower temps (like 3200K) give off warm, cozy, orange-ish light—perfect for friendly vlogs.
Higher temps (around 5600K) feel crisp and daylight-like, great for clear, focused videos.
You want to match your light’s Kelvin with your camera’s white balance, or else your face might end up looking like a pumpkin—or a frozen astronaut.
Aim for 4000K–5000K for a neutral, natural look that flatters your skin and keeps shadows clean.
Warmer lights can boost blue noise, while cooler ones help you look sharp.
Use bi-color lights to tweak on the fly, and always pick high-CRI bulbs so colors—especially your skin tone—stay true.
Get this right, and you’ll look like *you*, just webcam-ready.
Maximize Natural Light Effectively

Where should you find the best lighting for your webcam?
Right by a window — your own personal spotlight!
Face it directly so soft daylight wraps your face evenly, like a warm hug for your features.
Avoid sitting with the window behind you — unless you want to look like a mysterious silhouette in a detective show.
Place your camera between you and the window, keeping bright panes out of the frame.
If the sun’s too harsh, sheer curtains or a white sheet work magic, diffusing light like a professional studio.
Bounce it off a wall or a piece of cardboard to fill in shadows.
Aim for morning or late afternoon glow when the sun’s in a good mood — soft and flattering.
Move closer to the window when it’s dim, and tweak blinds to stop your camera from overreacting.
Pro tip: your face should steal the show, not the background!
Balance Ambient and Artificial Lighting
Playing with light isn’t just for artists and cinematographers — you’ve got the power to turn your webcam setup into a mini studio by mixing ambient and artificial light like a pro. Start by setting your camera to manual mode, exposing for ambient light first, then gently adding artificial light to fill in shadows. Use slow shutter speeds to brighten the background or fast ones to darken it, but stay within sync limits. Keep your ISO low to reduce noise and adjust flash power accordingly. You’ll want soft, natural-looking light, so bounce it off walls or ceilings, or use diffusers. Matching color temperatures is key — don’t let your lamp make you look like a roasted marshmallow!
| Light Aspect | Pro Tip |
|---|---|
| Shutter Speed | Fast = dark background, subject pops |
| Aperture | Wider = softer background, sharper subject |
| White Balance | Match temps so you don’t look like a alien |
Avoid Common Lighting Mistakes

- Don’t place lights overhead—it casts harsh shadows under your eyes and chin, making you look tired or like a villain in a horror flick.
- Never backlight yourself—sitting with a bright window or lamp behind you turns you into a mysterious silhouette, and no one wants to play guessing games during a meeting.
- Skip harsh, direct lighting—undiffused bulbs create shiny hotspots on your forehead and cheeks, washing you out like you’re auditioning for a zombie cameo.
Fix these, and you’ll instantly look more awake, professional, and camera-ready!
Angle Lights for Flattering Facial Features
Ever wonder why some people always look like they’re in a movie, even on a basic webcam? It’s all about angling your lights just right. Position your key light slightly above eye level, shining gently down—this smooths skin and softens shadows, like a built-in filter.
Front-facing light works best, evenly balancing your features without harsh contrasts. Try a ring light or softbox to keep things soft and glowing, avoiding that “undercooked” look from harsh overhead bulbs.
If you’re in a group, point the light closer to anyone with darker skin to keep tones rich and true. And don’t forget: elevate your webcam just above eye level—this little chin-lift trick keeps your neck looking sleek and your posture sharp.
Aim the lens at face height, center yourself in the frame, and boom—you’re basically a Zoom superstar. With the right angle and light, even your cat might ask for selfies.
Test Your Setup Before Going Live

How’s your webcam treating you—like a crystal-clear window to your best self, or more like a foggy bathroom mirror?
Don’t guess—test it before you go live!
A quick check keeps you looking sharp and saves you from awkward “Can you see me now?” moments.
Here’s how to nail it:
- Use online tools like webcammictest.com—no install needed, just click and see your cam’s name, resolution, and frame rate in real time.
- Open your meeting app (Zoom, Teams, Meet) and preview your video—each has a test feature to confirm your camera, mic, and sound play nice together.
- Wipe the lens if it’s dusty, then check focus, color, and lighting so your face looks fresh, not fuzzy or oddly tinted.
Spend two minutes now to avoid five minutes of panic later—your future self will thank you!
Create Depth With Backlighting
When the light hits just right, you don’t just show up on screen—you pop.
Place a backlight 3–6 feet behind you, right at head height, to outline your hair and shoulders like a pro.
Angle it slightly up so it doesn’t flare into your webcam.
This rim of light separates you from the background, especially if your hair or shirt blends in.
It adds cinematic depth—even on a flat little screen.
Keep the backlight softer than your main light so you don’t turn into a glowing silhouette.
Outdoors? Turn toward the sun and bounce light back onto your face with a white board or even a piece of paper.
Mix in a subtle fill light to soften shadows, and boom—you’re glowing with dimension, not disappearing into your bedroom wall.
You’re not just on camera—you’re *in* the scene.
Frequently Asked Questions
Can I Use Candles for Webcam Lighting?
No, you can’t use candles for webcam lighting—they’re way too dim and flickery.
Your camera’ll struggle, leaving you looking patchy or shadowy.
Plus, open flames? Totally sketchy near tech and curtains.
Why risk it when you’ve got brighter, safer options?
Swap candles for a daylight bulb or ring light, and boom—clear, glowy skin without the fire hazard.
Safety first, sparkle second!
Do LED Strips Work as Main Light Sources?
Yeah, LED strips totally work as your main light source—you’re not just stuck with boring bulbs!
Toss one behind your monitor or along the wall, and bam, you’ve got smooth, even glow.
Just grab a high-CRI strip with daylight settings, diffuse it with a curtain or frosted cover, and say goodbye to creepy shadows.
It’s like giving your face a soft halo—flattering, bright, and way cooler than squinting under a ceiling light.
How Do Glasses Affect Lighting Setup?
Your glasses turn into tiny mirrors, dancing with light spots that distract faster than a squirrel in a disco.
You’ve gotta tweak your setup so glare doesn’t steal the show.
Angle lights from the sides, not behind you, and keep them above eye level.
Tilt your glasses slightly or use a polarizer—it’s like invisibility cloaks for reflections.
Problem solved, hero!
Is Colored Lighting Ever Appropriate for Video Calls?
Yeah, colored lighting can work—but keep it subtle, not neon party mode.
You’re going for “artistic vibe,” not “rave in your closet.”
Soft pastels add flair without stealing the show.
Just dodge wild hues that turn your face green or pink—unless you’re auditioning for a cartoon.
Match color temps, avoid clashing lights, and let your personality, not your LEDs, be the brightest thing on camera.
Can I Overdo Soft Lighting?
Yeah, you can totally overdo soft lighting—trust me, it’s not just “more light = better.”
Pump in too much, and your face flattens out like a pancake, details vanish, and your camera freaks out, dimming everything or adding that weird “soft focus” filter.
Bright spots on your forehead or glasses? Classic over-soft lighting fails.
Back off a bit, let shadows do their thing, and boom—depth, dimension, and way more “I’ve got my life together” energy.
Conclusion
You’ve got this—lighting and angles are your secret sauce, not a science experiment. Picture yourself as a morning cup of coffee: warm, glowing, and impossible to ignore. Dodge shadows like they’re Monday blues, and tilt that camera just right. A quick test run keeps surprises at bay. Now shine bright, you dazzling chat star, because on camera, you’re not just seen—you’re unforgettable.