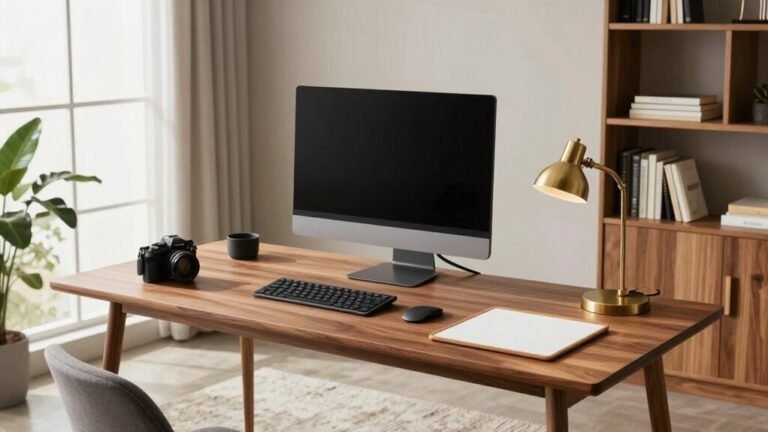
How to Create an Inspiring Gallery Wall for Your Home Office

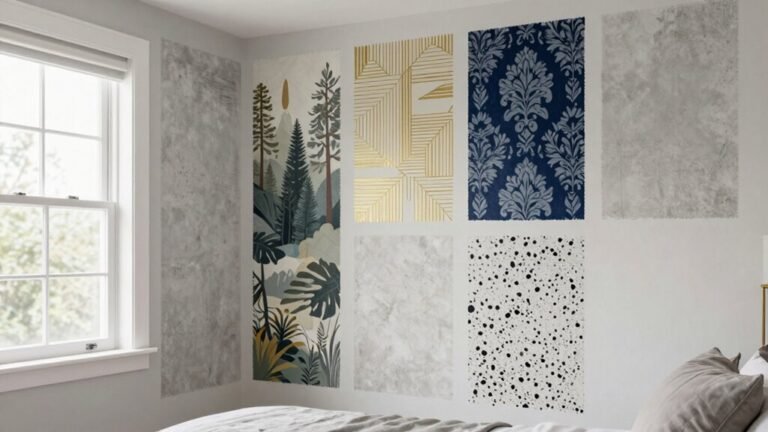
Creating an inspiring gallery wall for your home office starts with choosing a color story that sparks joy. Pull hues from your favorite art, curtains, or decor to establish a cohesive palette that ties into your space.
Incorporate pops of gold or blue for visual interest, ensuring the main keyword—inspiring gallery wall—guides your design choices. Anchor the display with one bold piece, placed slightly off-center, to create a natural focal point.
Build around the anchor with a mix of frame sizes and styles, combining matted and unmatted art for depth. Keep spacing tight and consistent to maintain a unified look across your inspiring gallery wall.
Hang the arrangement at eye level and test layouts on the floor first to visualize balance. Add warm lighting to highlight key pieces and enhance the overall ambiance.
Rotate artwork seasonally to keep the display fresh and evolving. Let your home office gallery wall grow with you—there’s always more inspiration to uncover.
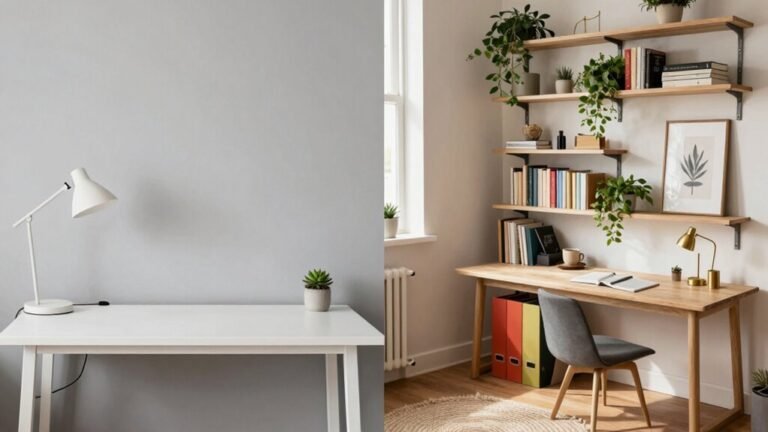
Choose a Cohesive Color Palette for Visual Harmony
Ever wonder how some gallery walls look like they belong in a design magazine while yours feels a little “meh”? It’s probably the color palette doing the heavy lifting!
You’re not just throwing up random art—you’re creating harmony with a smart color strategy.
Start by using the color wheel to mix secondaries like green or orange from primaries like blue and red.
Pick a combo that matches your room’s vibe—neutrals like Repose Gray let your art shine, while bold Onyx adds drama.
Pull in hues from your curtains or sofa to tie everything together, and stick to similar tones so it feels curated, not chaotic.
A little gold or blue here, a consistent frame color there, and boom—you’ve got elegance with zero effort.
Who knew your wall could look this good without a degree in design?
Use the focal prints’ colour palette to create cohesion throughout the gallery wall.
Select a Focal Piece to Anchor Your Composition
One standout piece can transform your whole gallery wall from “just a bunch of frames” to “wow, that’s awesome.”
Start by picking the largest artwork—your anchor—and let it take charge.
It’s the star of the show, so hang it first.
Place it slightly off-center for a fun, dynamic vibe that makes eyes wander instead of stop.
This big beauty sets the tone, color, and mood, like a boss holding the whole crew together.
Think of it as the keystone—remove it, and everything feels wobbly.
It gives you a scale to match the other frames, so nothing looks lost or too shouty.
Let it shine with a picture light or near a window to boost its punch.
Whether it’s a painting, photo, or quirky sculpture, make it *you*.
This isn’t just decoration—it’s your story starting right here.
Mix Frame Sizes and Styles for Dynamic Interest

What if your gallery wall could dance? It can—when you mix frame sizes and styles just right.
Go bold with a large piece, then balance it with smaller ones, like a visual rhythm that catches the eye.
You’re not just hanging art—you’re creating a story.
Stick to two or three frame styles, maybe a sleek black next to warm wood, or a shiny metal beside an ornate gold.
Too many types, and it’s chaos; just enough, and it’s charm.
Odd numbers work best—think threes or fives—because they feel natural, not staged.
Throw in a mix of matted and unmated pieces for extra flair, and keep colors in harmony, even if frames differ.
Odd numbers are more appealing, and using them enhances balance and visual interest.
You’ll get dynamic energy without the mess.
After all, your wall’s not a museum—it’s a mood, a vibe, a little art party where everything plays nicely.
Plan Layouts With Purpose Using Grid or Cluster Patterns
You’ve got your mix of frames dancing in style—now let’s give them a stage that makes them shine.
Go for a uniform grid if you love clean and calm: same-sized frames, even spacing, and one cool theme—like all beach vibes or black-and-white family moments—create order without boring things out.
Prefer a little more pizzazz? Try a square or rectangular layout to fit that wall above your desk, or play with alternating patterns using two frame sizes in neat columns.
Clusters are your fun-loving friend—pack frames close, mix orientations, and build around a standout piece for cozy charm.
Mirrored magic or geometric sets bring balance with matching sizes and symmetry.
Plan on paper first, and you’ll hang like a pro.
Your wall won’t know what hit it!
Position at the Right Height for Optimal Viewing

Ever wonder why some gallery walls feel like they’re shouting for attention while others whisper elegance?
It’s all about height.
Aim to center your entire gallery wall at 57–60 inches from the floor—that’s eye level for most people and makes viewing comfy and natural.
Think of your cluster like one big piece of art; find its center and line that up with the 57-inch sweet spot.
If you’re mostly sitting at your desk, go for the lower end of that range so you’re not straining your neck.
Hang it too high, and you’ll feel like you’re at the dentist staring up at a light.
Over a desk or console? Leave 6–8 inches of breathing room above the furniture.
Stand back, squint, and check the flow—your eyes should glide, not climb.
When in doubt, grab a tape measure and a friend (or a skeptical cat).
You’ve got this!
Maintain Consistent Spacing Between Frames
While it might be tempting to just slap those frames up and call it a day, taking a minute to nail the spacing makes all the difference—like giving your wall a well-ironed outfit instead of a wrinkled T-shirt.
You’ll want to keep gaps between frames at 2–3 inches; it’s the sweet spot for looking intentional, not messy or too sparse.
This creates that “one big artwork” vibe, even with mixed sizes.
Go too tight, and it feels crowded.
Too wide? Now it’s a wall of loners.
Keep it consistent, especially in grids or themed sets, to guide the eye smoothly.
- Use a scrap of wood cut to 2.5 inches to quickly check gaps
- Measure from the center of one frame to the next for accuracy
- Lay it all out on the floor first—your knees will thank you later
Use Templates to Test Arrangements Before Hanging

Nailing that perfect gallery wall starts long before the first nail hits the wall—and once you’ve sorted your spacing game, it’s time to play around with planning.
Skip the wild guessing and use free online templates: 67 editable options fit any size, from two frames to sprawling masterpieces.
Drag, drop, and mix prints like you’re curating your own museum—because why not?
Tools like Printique’s Design Wizard or WallPoet let you visualize layouts digitally, even with your actual room photo.
Feeling old-school? Try life-size paper templates that mark exact nail spots—no “oops” moments.
You can test combos, play with orientations, and create T’s or H’s for cool visual flow.
Mix frame types, art styles, or go full Picasso-mode—no rules, just vibes.
With auto-design features and real-size mockups, you’ll see the magic before any holes appear.
It’s like a dress rehearsal for your walls—and way more fun than patching drywall later.
Install Hardware Based on Wall Type and Frame Weight
When you’re ready to hang your gallery wall, the last thing you want is a frame crashing down because the hardware wasn’t up to the job—so let’s match your setup to your wall type and frame weight like a pro.
- Drywall? Hit a stud with a 2.5-inch #8 screw for heavy frames, or use a toggle bolt if you’re flying solo from a stud—Bear Claws can handle 100 lbs there!
- Plaster or brick? Go long and strong: use molly bolts or nylon anchors, and don’t skimp—those anchors need to grip like they mean it.
- Big or bold art? Swap flimsy hooks for STAS rails or 100-lb-rated hardware; your masterpiece isn’t just decor, it’s a statement.
Now, go hang it with confidence (and maybe a little swagger).
Incorporate Lighting to Highlight Key Artwork

You’ve got your frames securely hung, your layout locked in, and now it’s time to make those pieces truly pop—lighting is where the magic happens.
Mix ambient, task, and accent lights to add depth and banish flat, dull glows.
Try wall-washing for soft background shine, then spotlight key art with adjustable track heads or chic picture lights.
Go for LEDs—they’re cool, efficient, and dim like a pro.
Aim lights at a 30-degree angle to dodge glare and make colors sing.
Pick warm light (2700–3000K) for cozy vintage vibes or neutral (3000–3500K) for modern pieces.
Use high-CRI bulbs (90+) so reds stay red and blues don’t turn sad.
Place fixtures 18–24 inches from the wall, and don’t let beams spill like overenthusiastic sprinklers.
Highlight your stars brighter, let supporting acts shine softer, and voilà—your gallery’s got drama, depth, and a spotlight-ready vibe!
Rotate and Refresh Displays to Sustain Inspiration
Keeping your gallery wall feeling fresh isn’t just smart—it’s soul-fueling.
You’ve put heart into your space, so keep it breathing with regular rotations that spark joy and focus.
Sync swaps with seasons, goals, or even your coffee habits—whatever keeps you inspired.
Short on time? Digital frames or a standout centerpiece can change the vibe with zero hassle.
- Swap smart: Rotate art every month or quarter, and save one big overhaul a year to shake things up like spring cleaning for your walls.
- Stay organized: Use labels, pre-framed backups, and a wall layout photo so switching art feels as easy as changing a playlist.
- Keep it lively: Try new themes—“Bold Colors Month” or “Project Victory Highlights”—because nothing says fun like letting your walls tell a new story.
Your wall should surprise you.
If it’s blending in, it’s time to mix it up.
Frequently Asked Questions
How Do I Hang Art on Textured or Brick Walls?
You’ve got options!
For textured or brick walls, skip the drill and grab heavy-duty adhesive hooks or 3M Command strips—just clean the surface first.
Prefer something sturdier? Use brick clips that grip the edge or mortar hooks slipped between bricks.
If drilling’s okay, grab a hammer drill, aim for the brick (not mortar), and use wall plugs with screws.
Easy, peasy—your art won’t ghost you!
Can I Mix Mirrors With Artwork in a Gallery Wall?
You absolutely can mix mirrors with artwork in a gallery wall—it’s a total game-changer!
They add sparkle, bounce light around, and make your space feel bigger, like magic.
Pair a sleek round mirror with bold prints or go vintage with quirky frames.
Just play with shapes, sizes, and textures so it feels fun, not fussy.
Hang them with intention, snap a pic of your layout first, and boom—you’ve got depth, drama, and a dash of “wow.”
What’s the Best Way to Display Children’s Artwork Professionally?
Oh, you *want* it to look professional?
Cute.
Grab those kid masterpieces and stop taping them to the fridge like it’s the Louvre of leftovers.
Frame a few in sleek Lucite or use foam tape for a pop of depth, arrange by color or theme, add fun labels with their name and title—yes, “Dinosaur Eating My Homework” counts—then hang at their eye level.
It’s art, not clutter.
You’re basically a curator now.
Congrats!
Should Gallery Walls Extend Beyond the Width of Furniture Below?
Yeah, your gallery wall can totally stretch beyond the furniture—it’s not a fashion faux pas!
Just make sure it still feels connected, like they’re besties.
Keep that 4–8 inch gap above the piece, and center the whole arrangement on an eye-level bullseye.
If it’s wider, treat it like one big art monster, not a bunch of solo stars.
Balance is key, but have fun with it—rules are more like art-related suggestions!
How Can I Make a Small Gallery Wall Feel Larger?
You make a small gallery wall feel larger by playing clever tricks with size, light, and space—like a magician with frames!
Hang your biggest piece off-center to pull the eye around, and mix in smaller ones like puzzle pieces that grow the vibe.
Use slim frames, consistent spacing, and a splash of mirror to bounce light.
Throw in a light-toned print for breathing room, and voilà—it’s not bigger, but it’s definitely bolder.
Conclusion
You’ve got this! Hang those frames, mix in some funky art, and boom—your wall’s got more personality than a Renaissance fair in sneakers. Just remember, even Picasso probably used a pencil first. Step back, admire your masterpiece, then grab a snack—you’ve earned it. Keep switching things up, because who wants stale decor? This wall’s not just art, it’s your vibe, your energy, your “I totally adulted today” trophy.